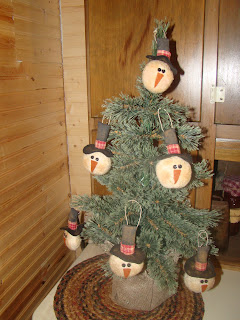
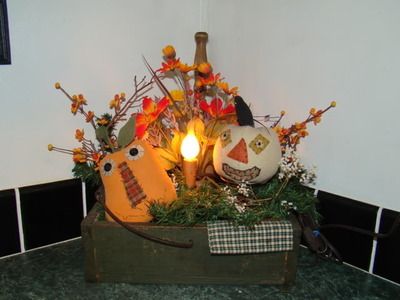
Here is a few pictures of my decorations.
Friday, December 9, 2011
Thursday, December 1, 2011
Snowman ornie tutorial
I thought i would share with how i make snowman head ornies. I added pictures at the end of post . I used warm and natural batting for the head or you can use osnaburg or muslin. For the hat i used wool felt for the brim and muslin for the hat top. You will need a circle that is 2 1/2 inches round, i used a 2 oz solo cup that i use for making candle tarts. Trace your your circle using your cup onto doubled thickness of fabric. Next sew all the way around on the line you traced. Cut a small slit in one layer of the head and turn right side out. Using your favorite staining mixture stain the head. After it is stained and dried stuff if and sew the slit shut. I used 2 small buttons for the eyes and sewed them on. I went through the top of the head, that way the hat will hide the knots. For the nose i cut out a long triangle using rust colored wool felt and hot glued it on. you can use dmc floss and stitch on the eyes and nose.
For the hat brim i used the same circle i used for the snowman head and traced it onto 1 layer of black wool felt and cut out on the traced line. For the hat top you will need piece of muslin that is 2 1/2 inches by 2 1/2 inches, fold it in half and now it should be 1 1/4 wide by 2 1/2 long. Starting at bottom of the long end sew up the side and across the top. It should look like a long tube open at one end, turn right side out. Now the messy part. I used black paint and watered it down a bit . I wore a pair of rubber gloves and slid the tube onto my pointer finger and then painted it that way it held its shape while drying. After the hat has dried center it on the brim and stitch in on. Add a piece of homespun to your hat. I hot glued my hat to his head or you can sew it on.
Now take some Cinnamon and rub all over his head and hat to your liking. Add a string to his hat for hanging. I went down about 3/4 in from the top of his hat and he hangs on the tree nicely. If you'd like you can embellish his hat with greenery, bells, pins,or glitter,be creative. I'd love to see what you come up with.
 |
| Hat Top |
Wednesday, November 16, 2011
Santa and Snowman
A few years ago i picked up some black and red wool not knowing what to do with it. I found it the other day and decided to make a Santa with it. I plan on setting him next to the Christmas tree after i put it up. I came across a gingerbread man pattern and started working on one and it ended up being a snowman.
Thursday, November 10, 2011
A few new christmas things
I have been working on a lot of ornies for a swap over at Primmart and finally got them finished so now i have been making a few new things for this Christmas. The swap is so exciting, the anticipation and wondering what will be in the box. I feel like a child waiting for Christmas morning. First up is Father Christmas .and second is Santa's clothes line (pattern by Samantha's accessories) I hung the clothes line by an old wood stove in the entryway as if they are drying.
Thursday, October 27, 2011
Christmas goodies
Christmas is going to sneak upon us soon. I ordered a few goodies and decided to put them out so i could enjoy them. The Santa's and bells are from The Olde Country Cupboard ,the Bora berries are from Colonial tin works and the plate is one i had laying around.
Wednesday, October 19, 2011
A few finds
I went to an auction and a few yard sales and came across a few things i could not resist. I love sleds and toboggans and hope to do a display in my entryway this winter. The smaller of the two has the original price tag on it and the store it was bought from here in town has been closed for 25 years. I also picked up a few spools for a dollar apiece , suitcase for $5 and kitchen goodies total of $7.00.


Tuesday, October 4, 2011
Chair Makeover
I picked up this chair at an estate sale a while back and finally got around to give it a makeover. It didn't take much and I'm happy with the out come. First i had to get the old ripped leather seat off and all the broken tacks. After i got it all removed i was left with a hole in the center of the seat, I'm thinking there was an original wicker seat and when that wore out they replaced it with leather. I used murphy's oil soap and hot water and washed the chair a few times. As the chair was drying i drew out the shape of the hole onto plywood and covered it with some upholstery i had.
Tuesday, September 27, 2011
Friday, September 23, 2011
Charlie the scarecrow, Halloween Candles and Tarts.
Iam pleased with how Charlie the scarecrow came out. He is from a pattern by The olde country cupboard. He sits in a paint can i painted brown and i used an old metal funnel i found at the flea market for his hat. I wanted to use up some of my wax i had on hand so i made up a few candles and tarts for halloween. I did some outdoor decorating and will post pictures on monday. Have a great weekend.
Wednesday, September 14, 2011
34 Degrees, Scarecrow and noise makers
Fall is officially here, the temp this morning was 34 degrees and tonight they are saying 28. I was hoping the cold weather would hold off for a few more weeks in hopes that the rest of my pumpkins would turn orange. Here is a couple of things i have gotten done for fall a while back and thought i would share with you. The first is a scarecrow i love how he turned out. Pattern is by Samantha's accessories. The second was so much fun to make, they are noise makers and each have 4 bells on them and make alot of noise when you shake them.. Pattern by Back Porch Pickins. I have a few more scarecrows in the works and will share with you when they are finished.
Wednesday, September 7, 2011
Welcome to my new blog
Hello and welcome to my blog. This first post is going to be a test run for me. It has been a journey trying to figure all this blogging stuff out but I'm getting there. Once i get the hang of it should be easier. I hope to share with everyone my passion for prim decorating and crafting.
I live in a small town in north western Mn. where the winters are cold. Born and raised here I'm used to it and don't think i could live where there is no snow. Now with fall upon us I'm getting anxious to start decorating for the season.
I live in a small town in north western Mn. where the winters are cold. Born and raised here I'm used to it and don't think i could live where there is no snow. Now with fall upon us I'm getting anxious to start decorating for the season.
Subscribe to:
Posts (Atom)


